
How to Make a Photo Collage That Fits a Frame (4x6, 8x10, Square)
Choose the right print size for your frame, allow for the mat opening, and match your collage layout. Check image sharpness and cropping before ordering.
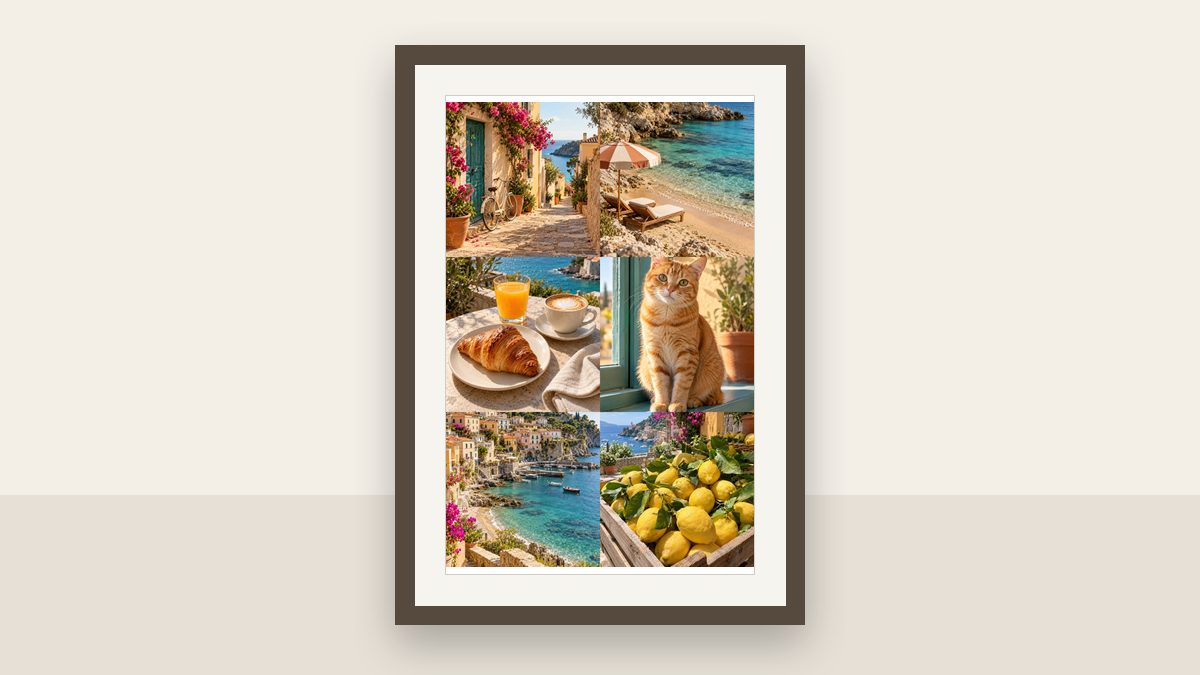
Start with the print size your frame or mat is designed to hold, then make a collage with the same shape in Photo Grid Collage Maker. Check the visible opening separately: a mat or frame lip can hide the edges of a correctly sized print. Matching the shape also does not guarantee a sharp print; check the pixel dimensions before you order.
This guide uses common frame sizes in inches. The collage maker does not print or order frames; it creates the image file you take to a printer or a print service.
1. Check the print size and the visible opening
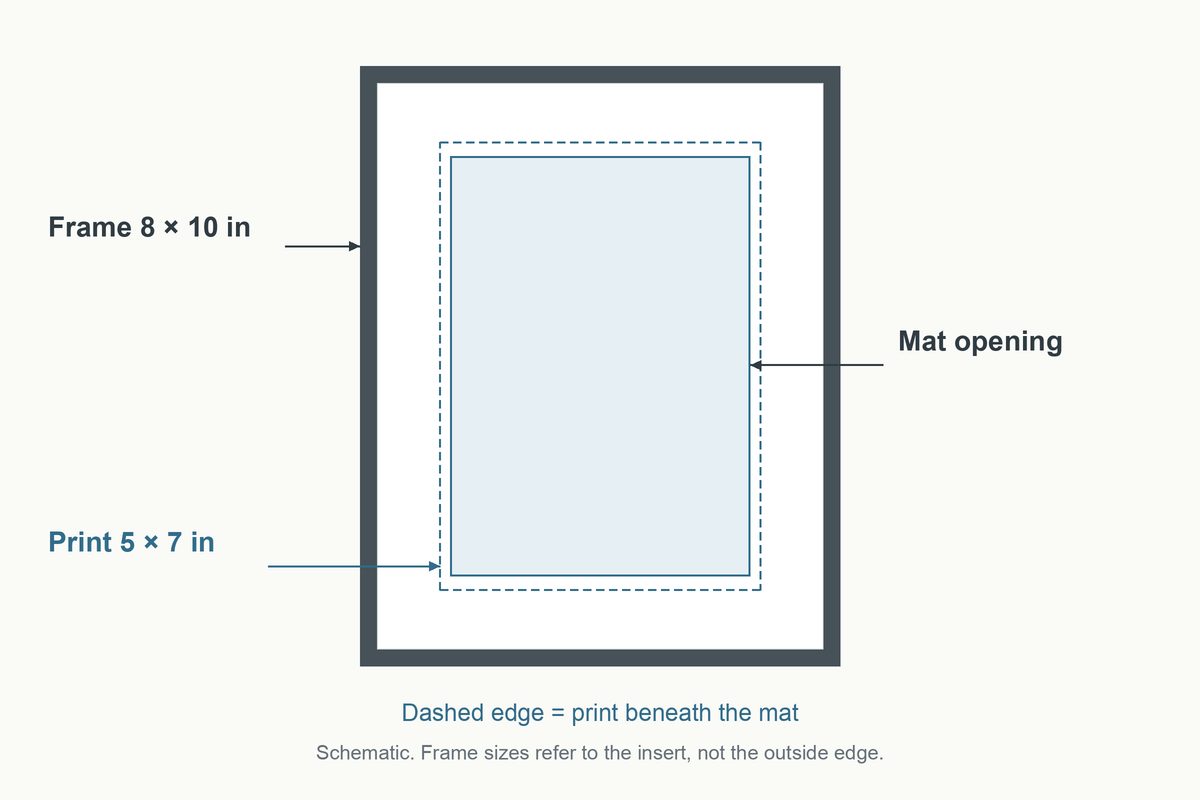
A frame's outside measurements are not the size to use for your print. Check its label or measure the backing area where the print fits, then check how much of that print will be visible:
- With a mat (the card border inside the frame), use the photo size the mat is made for. For example, an 8 × 10 frame may contain a mat for a 5 × 7 photo. Order the 5 × 7 print, not a print exactly the size of the cutout. The cutout is normally slightly smaller so the photo overlaps it; Frame Destination explains this distinction. Check your own mat because the overlap varies.
- Without a mat, the frame's lip still covers a thin strip on every side.
Keep faces, text, and other important details away from the outer edge of the collage. If the frame has no size label, take the backing and mat measurements to the print shop before choosing a print size.
2. Pick a layout with the same shape
The collage's shape comes from the number of rows and columns and the Cell shape in Style. These layouts match common print shapes when Spacing is 0 and Frame is None. Leave the optional Made with tag off for an unbranded JPG:
| Frame or print | Layout in the collage maker | Download size | Pixels per inch at that size |
|---|---|---|---|
| 4 × 6 in, portrait | 3 rows × 2 columns, Square cells | 1,080 × 1,620 px | 270 |
| 6 × 4 in, landscape | 2 × 2 (or 1 × 1, 3 × 3), 3:2 cells | 1,080 × 720 px | 180 |
| 8 × 10 in, portrait | 2 × 2 (or 1 × 1, 3 × 3), 4:5 cells | 1,080 × 1,350 px | 135 |
| Square, for example 8 × 8 in | 2 × 2 or 3 × 3, Square cells | 1,080 × 1,080 px | 135 at 8 in, 270 at 4 in |
Spacing adds gaps and an outer margin, which can change the overall shape. Use 0 for the dimensions in the table. If you prefer visible gaps, check the downloaded file in the print service's crop preview instead of assuming the proportions still match.
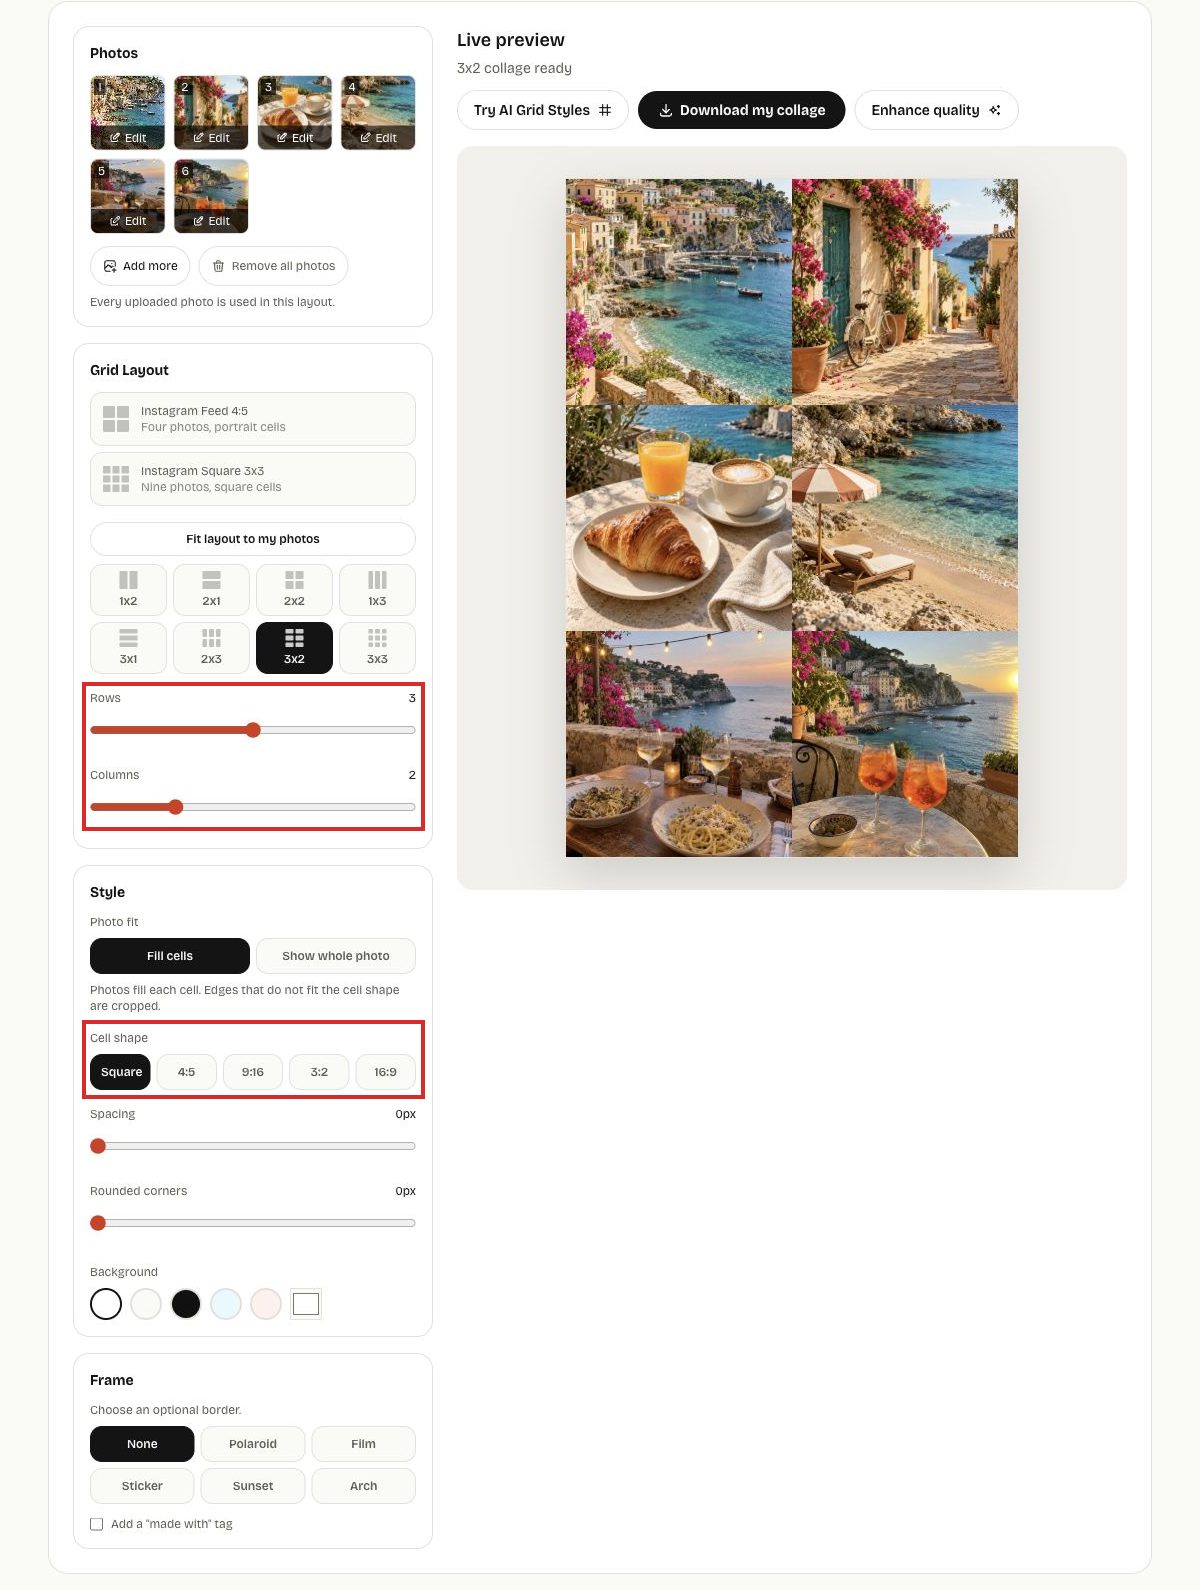
Turn off decorative frames for print sizing. In the Frame card, choose None. Frames such as Polaroid or Film add a border around the collage, which changes its shape and size.
Printing at 5 × 7 or A4
There is no dedicated 5 × 7 or A4 collage preset. You can use a nearby shape and choose how the printer handles the difference:
- Allow some cropping. For a 5 × 7 print, 2 rows × 1 column with 3:2 cells gives 1,080 × 1,440 px at zero spacing. Filling the paper trims about 5% of the image's total width, so check the left and right edges in the crop preview. For A4, you can start with 3 rows × 2 columns of Square cells, then check the top and bottom if you choose fill.
- Keep the whole collage and accept borders. Ask the print shop to fit the image to the paper. Empty strips appear on two sides. Check whether your mat covers them; do not assume it will.
3. Keep each photo whole inside the collage
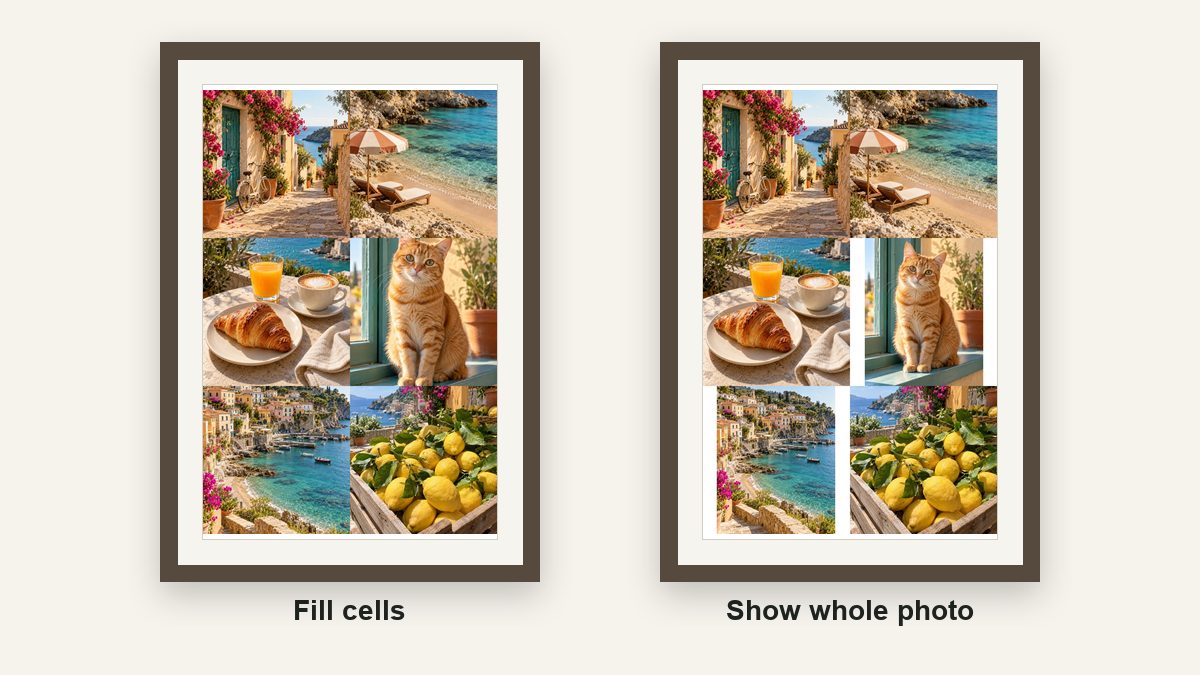
The frame is one crop; the collage cells are another. With Fill cells, each photo is cropped to its cell shape, so a portrait photo in a square cell loses its top and bottom. Choose Show whole photo in Style to keep every edge of every photo; the free space in each cell uses the background color. A white or light background usually looks intentional in a frame.
4. Check pixels per inch before you print
The collage maker downloads a JPG about 1,080 pixels wide. Divide the pixel width by the print width in inches to get pixels per inch (ppi). Adobe gives 300 ppi as a standard for high-quality prints; ask your print service what it recommends for the size and paper you chose. Lower values can look soft, especially in small details and text.
- 4 × 6 portrait: 1,080 px ÷ 4 in = 270 ppi. Close to the common target.
- 8 × 10 portrait: 1,080 px ÷ 8 in = 135 ppi. Likely to look soft up close.
For a large print, you can:
- Print smaller in the same shape. An 8 × 10 layout prints at 4 × 5 inches with 270 ppi.
- Try AI upscaling with Upscale Image. You can request 2K (4 credits) or 4K (6 credits) output with an account. Check that the available output shape matches your print; if it does not, use an editor that preserves the collage's aspect ratio. Inspect the downloaded dimensions, faces, and text before printing. AI can change details, so this is not a guarantee of a sharper, accurate copy.
Printing smaller is the option that does not require generating new pixels. Changing a file's resolution label alone will not add detail; Adobe explains how pixel dimensions and print resolution relate. Before ordering several copies, make one test print and inspect it at the size and distance you will use.
5. Choose fit or fill at the print shop
If the print service offers fit and fill controls, compare its previews before ordering. A matching image and paper shape avoids aspect-ratio cropping, but a borderless print setting can still trim the edges. When the shapes differ:
| Print shop option | What happens | Choose it when |
|---|---|---|
| Fill (or crop) | The image covers the whole paper; the edges that do not fit are cut off | Your photos have space around the important parts |
| Fit (or no crop) | The whole image is printed; empty strips appear on two sides | Nothing in the collage may be cut |
Checklist before you order the print
- The print size is the size the frame or mat is designed to hold; the visible opening has been checked separately.
- The collage shape matches the print (the table in step 2), and Frame is set to None.
- Pixels per inch at the print size are acceptable for how close people will look.
- Faces and text are away from the outer edge.
- The print shop setting (fit or fill) is chosen on purpose.
- For several framed collages that should match, use the same layout for all of them: see how to make several collages with the same layout.
Common questions
Can PhotoGrid print the collage or ship a frame?
No. It creates the image file. You print it at home or with a print service.
Why does my print look cut off even though the size is right?
Check both the print preview and the frame. The printer may crop the image to fill the paper, and the frame lip or mat can then hide more of the edge. Leave space around important details. Show whole photo prevents cropping inside each collage cell, but does not protect the final print from printer or frame cropping.
Does Show whole photo change the collage size?
No. Switching Photo fit changes how each photo sits inside its cell while keeping the overall collage dimensions unchanged.